Repairing drywall holes is a common household task that many homeowners face at some point. Whether it's due to accidental damage, wear and tear, or renovation projects, knowing how to patch a hole in drywall can save you time and money. This guide will walk you through the process step by step, ensuring your walls look as good as new.
Dealing with drywall damage doesn't have to be stressful. With the right tools and techniques, you can restore your walls effortlessly. Whether the hole is small or large, this guide will provide all the information you need to complete the job successfully.
From identifying the tools you need to finishing touches, we'll cover everything to ensure your drywall repair is seamless. Let's dive in and learn how to patch a hole in drywall like a professional!
Read also:Joanne The Scammer Unveiling The Truth Behind The Infamous Fraudster
Table of Contents
- Tools and Materials Needed
- Preparing the Area for Repair
- How to Patch Small Holes in Drywall
- How to Patch Large Holes in Drywall
- Repairing Damaged Drywall Corners
- Finishing Touches for a Perfect Finish
- Common Mistakes to Avoid
- Cost Considerations for Drywall Repairs
- When to Call in Professional Help
- Frequently Asked Questions
Tools and Materials Needed
Before you begin repairing a hole in your drywall, it's important to gather all the necessary tools and materials. Having the right equipment will make the process smoother and more efficient.
Essential Tools
- Drywall knife or putty knife
- Sandpaper or sanding sponge
- Utility knife
- Drywall saw
- Measuring tape
- Drill (optional)
Materials Required
- Drywall compound (joint compound)
- Drywall patch or mesh tape
- Replacement drywall piece (for larger holes)
- Primer and paint (to match your wall color)
Preparing the Area for Repair
Proper preparation is key to ensuring a successful drywall repair. Follow these steps to get your workspace ready:
- Clear the area around the damaged wall to provide ample working space.
- Clean the hole and surrounding area of debris, dust, and loose particles.
- Turn off electricity if you're working near electrical outlets or wires.
By preparing the area thoroughly, you'll minimize the risk of complications during the repair process.
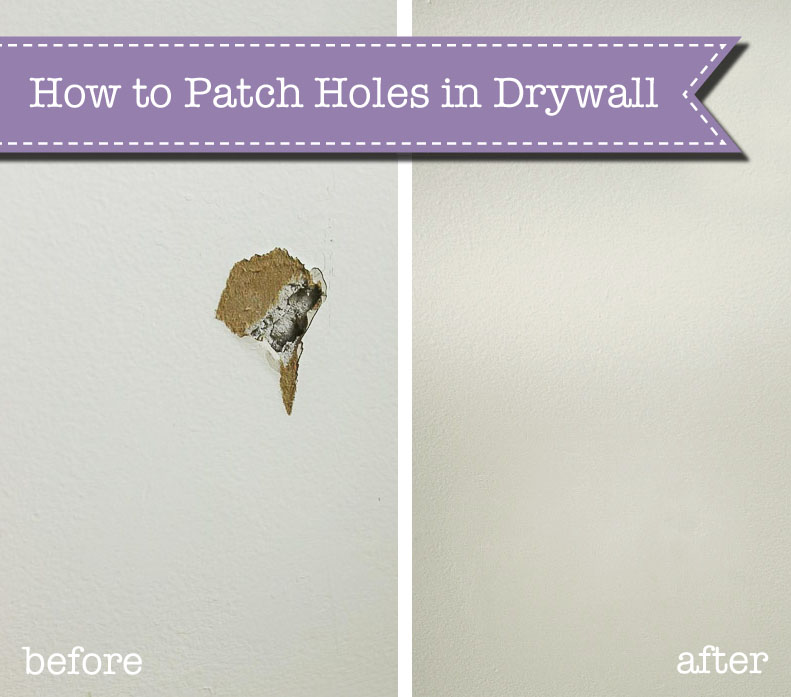
How to Patch Small Holes in Drywall
Small holes, such as those caused by nails or small impacts, can be repaired quickly and easily. Follow these steps:
Step-by-Step Guide
- Apply a small amount of drywall compound over the hole using a putty knife.
- Allow the compound to dry completely, usually overnight.
- Sand the area lightly to smooth out the surface.
- Apply a second layer of compound if necessary and repeat the drying and sanding process.
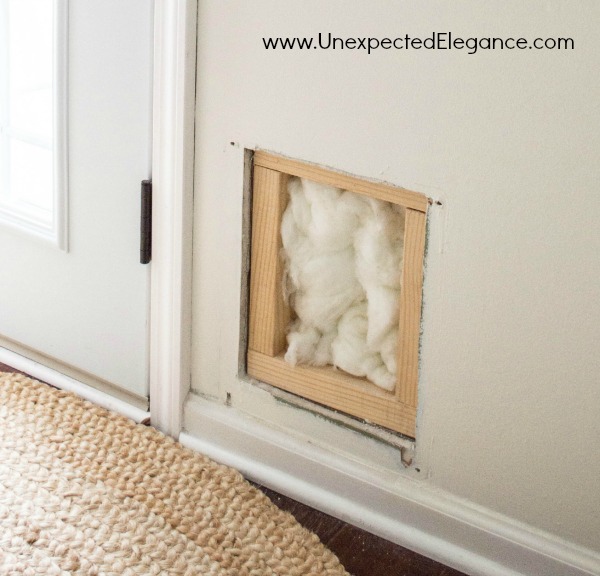
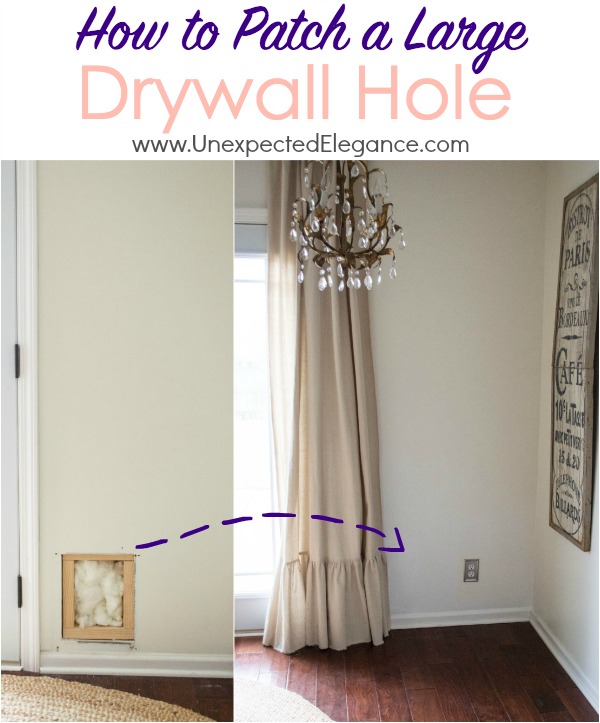
How to Patch Large Holes in Drywall
For larger holes, the process is slightly more involved but still manageable with the right approach.
Step-by-Step Guide
- Cut a square or rectangular patch of drywall slightly larger than the hole.
- Secure the patch in place using drywall screws or adhesive.
- Apply drywall compound around the edges of the patch and smooth it out with a putty knife.
- Let the compound dry, sand it lightly, and apply additional layers as needed.
Alternative Method: Using Mesh Tape
Mesh tape can be used to reinforce the edges of the patch, providing extra strength and durability.
Read also:Olivia Rodrigo Deepfake Unveiling The Truth Behind The Controversy
Repairing Damaged Drywall Corners
Corner repairs require special attention to maintain the sharpness and alignment of the edges.
Tips for Corner Repair
- Use corner bead tape to reinforce the edges.
- Apply multiple thin layers of drywall compound, allowing each layer to dry before sanding.
- Ensure the corner remains straight and aligned throughout the process.
Finishing Touches for a Perfect Finish
Once the repair is complete, it's time to add the finishing touches:
- Prime the repaired area to ensure proper paint adhesion.
- Paint the area to match the surrounding wall color.
- Inspect the repair for any imperfections and touch up as needed.
Common Mistakes to Avoid
Avoid these common pitfalls to ensure a professional-looking repair:
- Applying too much drywall compound at once, which can lead to uneven surfaces.
- Not allowing sufficient drying time between layers.
- Skipping the priming step, which can result in poor paint coverage.
Cost Considerations for Drywall Repairs
Repairing drywall holes can be cost-effective if done correctly. The cost will depend on factors such as:
- The size and number of holes being repaired.
- The quality of materials used.
- Whether professional help is required.
On average, DIY repairs can cost as little as $20 for materials, while professional services may range from $100 to $300 depending on the complexity of the job.
When to Call in Professional Help
While many drywall repairs can be tackled by homeowners, there are situations where professional assistance is advisable:
- Extensive damage requiring structural repairs.
- Complex electrical or plumbing work near the damaged area.
- Limited experience or confidence in completing the repair.
Frequently Asked Questions
Q: Can I use spackle instead of drywall compound?
A: Spackle can be used for small holes but may not be suitable for larger repairs due to its thinner consistency.
Q: How long does drywall compound take to dry?
A: Drying times vary depending on factors such as thickness and humidity, but typically take 24 hours per layer.
Q: Do I need to prime the repaired area?
A: Yes, priming ensures proper paint adhesion and helps the repaired area blend seamlessly with the rest of the wall.
Conclusion
Repairing a hole in drywall is a manageable task with the right knowledge and tools. By following the steps outlined in this guide, you can achieve professional-looking results and restore your walls to their original condition.
We encourage you to share your experience or ask questions in the comments below. For more home improvement tips, explore our other articles and resources. Happy repairing!